
How to check engine oil level
Checking your engine level should be taking place on a monthly interval.
The process takes very little time, but it’s essential that you are aware of how a ‘dipstick’ works
STEP 1: FIND THE DIPSTICK

Open the bonnet of your vehicle to reveal the array of pipes and box’s that to the average person can be seen as a confusing mess. The dipstick is not in the same location in every car, so you are going to have to do a bit of searching. The above example shows a rough shape of what you should be looking for, however every car is different, so we recommend you look online to find the where your’s is in relation to your vehicle.
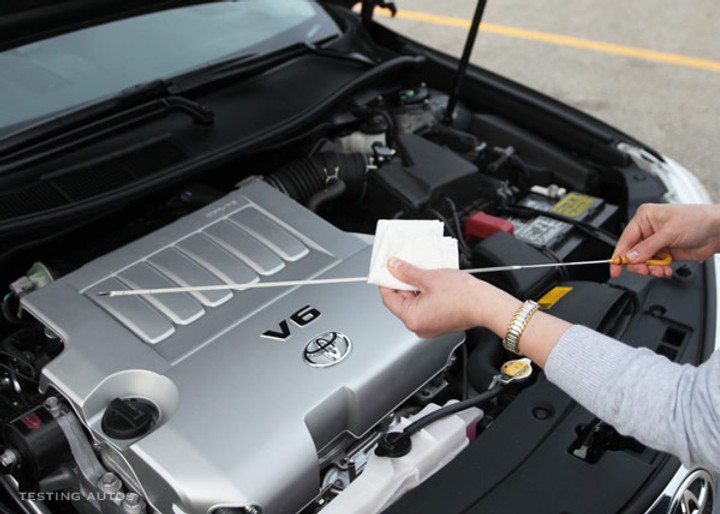
STEP 2: PULL OUT THE DIPSTICK AND WIPE IT CLEAN WITH A RAG
Make sure the engine has been off for around 20 minutes, others say you can perform this check before ten minutes, but we advise 20 just to be safe.

STEP 3: INSERT THE ROD BACK INTO THE PIPE IT CAME FROM
Make sure when doing this you put the dip stick back in the same way it came out. The pipe is made with a curve, that allows the metal to bend in the direction of the curve. Therefore, don’t be too forceful when putting the rod back in.
STEP 4: TAKE THE DIP STICK BACK OUT AGAIN AND LOOK AT THE LAYER OF OIL AT THE END OF THE ROD

Check how high the layer of oil reaches, and add oil if needed.
Moreover, you must check the condition of the oil to ensure it’s still healthy. If it isn’t you must change you oil.
NOTE: DO NOT PUT THE OIL IN THE PIPE WHERE THE DIPSTICK GOES IN
To add oil, find a screw off cap on top of the large engine which generally has an “oil cap” label on it, but may also have something else.
Once all of these steps are complete, you have successfully finished your engine oil level check, and can go on with life knowing your car oil levels are in tip top shape!
Recent Comments